

If you want to enhance your photography skills, you need to learn more about advanced photo editing and retouching tips. There are many techniques that you can use to achieve great results.
In this article, you will learn about the main tools that you can apply to your photos, such as the Healing brush, Clarity and Fade sliders, and the Sharpening tool. Ultimately, you will learn how to achieve the most natural results in your photographs.
Sharpening Tool
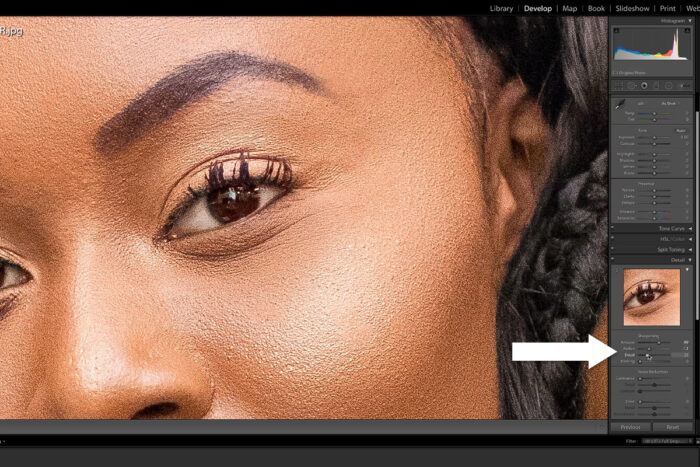
Sharpening is a common photo editing tool in Adobe Photoshop, which helps to improve the sharpness of your image. It can also help to reduce minor blurring issues.
Whether you are a new photographer or an expert, you can use the Sharpen tool to improve your images. You can find it in the Filter menu. If you’re just beginning with sharpening, start on a low setting to avoid distorting your image.
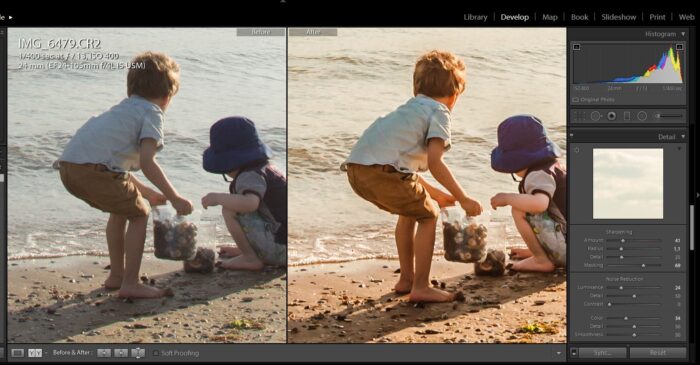
There are three main settings you can choose from. These include a threshold, a pixel radius, and an amount. The first two are used to limit the amount of sharpening applied to your image, while the third is an interesting feature that gives you control over the sharpening process.
While there are several types of sharpening tools, the one we are discussing today is the Photoshop Paintbrush method. This is a quick and easy way to sharpen a photo. However, it doesn’t give you complete control over the amount of sharpening.
Another option is to use a more sophisticated sharpening tool. For example, you can apply a High Pass filter. This filter concentrates on the edges of shapes and can be used with Overlay or Linear Light blending modes.
In order to sharpen an image, you’ll need to select the appropriate filter for your needs. For instance, a High Pass filter is ideal for enhancing the sharpness of an object.
This Service is designed to make the whole process easier for you, they usually work in photoshop, it allows you to import and process multiple images at once. Among other features, it provides a user forum and support videos.
Clarity & Fade Sliders
The Clarity and Fade sliders in advanced photo editing and retouching tips aren’t the only tools to make your photos pop. Other tools like curves, dodge and burn and clone can help enhance your work. You’ll want to find the tools that work best for you and your photos.
For starters, you can use the Exposure tool to tweak the brightness and contrast of your images. You can also use the sharpening tool to improve the quality of your image. In addition, the Curves tool lets you adjust the color of each area of your photo in a way that you can’t do with the regular sliders.
Using the exposure tool and the curves tool together can bring out the best in your photo. Similarly, the sharpening tool can make your photo subject more defined. Similarly, you can also apply a Radial filter to enhance your subjects eyes and also can use to change eye color. These are the most important features to master for creating photos with a polished look and feel.
Luckily, if you haven’t already used it, it isn’t difficult to do. All you need is the proper software, a little creativity, and a bit of practice. Once you’ve got the hang of the tool, you’ll be able to use it on every photo you take.
Whether you are a professional photographer or just someone who wants to take their hobby to the next level, Snapseed can be a big help. It offers all the tools you need to edit your photos on the go. Moreover, it has a very user-friendly interface. And for beginners, there’s a wide selection of automatic filters and sliders to choose from.
Saturation Sliders
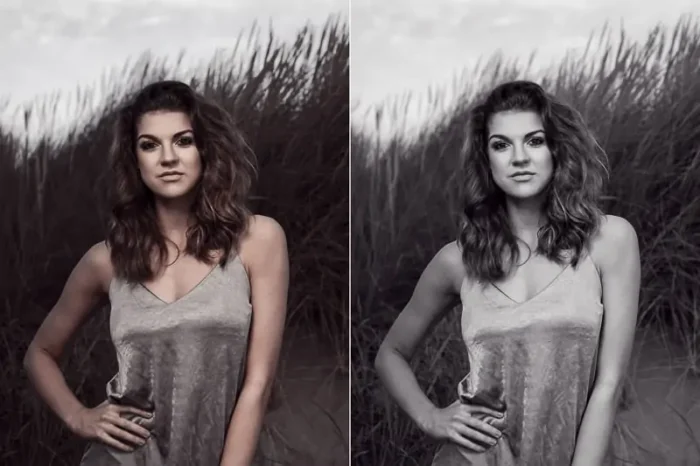
Saturation is a photo editing and retouching tool that can dramatically affect the mood and feel of your photographs. For portraits, using too high a saturation level can cause clothing to look like it was painted on. However, low saturation levels can also be used effectively to give your photographs a subtle, realistic appearance.
Professional photographers often use photo editing and retouching software like photoshop, illustrator to add and subtract color and contrast to their photographs. They can adjust their white balance, or they can apply a variety of techniques to increase or decrease saturation.
When you are ready to edit your photos, you should familiarize yourself with the different types of sliders. The Photos app lets you double-click on an image to open it in the Adjust panel. This panel contains two sliders. One is the Clarity slider, which adds mid-tone contrast and increases apparent sharpness.
Another slider, the Vibrance slider, adjusts the intensity of less saturated colors. It boosts them more quickly than saturated ones.
Other tools that adjust color and contrast are the Shadows and Highlights panels. These two sliders can darken and brighten the most prominent portions of an image. You can also use the black and white adjustment to fine-tune your tones.
You can learn how to use the various sliders in the Adobe Photoshop tool to enhance your photos. Saturation, vibrance, and contrast are all important and should be used wisely. To do so, you need to know how to adjust each slider and use your intuition.
If you are a beginner, you should start by applying small values. Don’t go beyond +15, though. Increasing the sliders too far can change the way the image looks, and the best results are achieved when you keep the sliders under control.
Healing Brush
There are a lot of ways to use the Healing Brush in Photoshop. For instance, you can use it to fix skin imperfections, lower the opacity of a layer, and clean up cloned areas.
It can also be used for animation frames. You can select the healing brush with the R key, and then move the cursor over the area to be retouched. The options bar will be visible and you can adjust the size of the brush.
You can also apply the healing brush to a new layer. This allows you to work non-destructively. To do this, click and hold the R key for a short period. After you’ve done that, you can return to the blemished area.
When using the healing brush, you’ll need to be careful about blending. That’s because the tool blends texture with color and luminosity to match the destination. But you also have to be careful about blending outside the area.
For example, you might accidentally get rid of dark circles underneath your eyes. If so, you’ll have to reapply the brush strokes. In some cases, you’ll have to adjust the Blend Mode, which changes the effects of the new pixels.
There are also keyboard shortcuts you can use to speed up Spot Healing Brush. Using the Z key to zoom in can reveal any unwanted aspects of your image.
Another option you might consider is to use the Patch Tool. This tool can be found in the same flyout menu as the healing brush. Unlike the clone stamp tool, it’s much smarter. Instead of copying and pasting a selection, it uses an algorithm to find the best pixels.
Composition
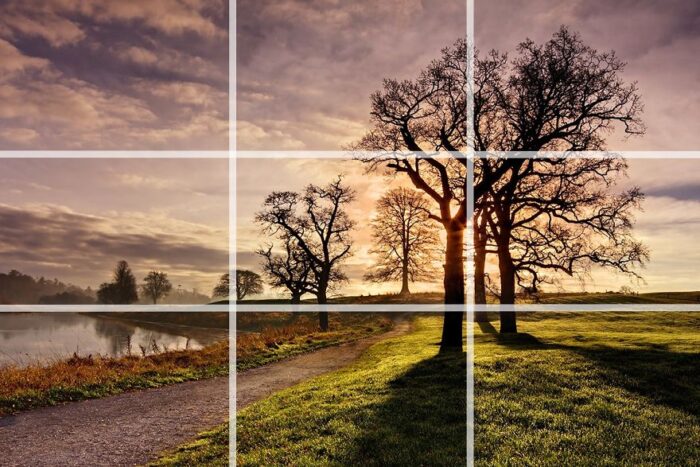
A good photograph should have a good focal point and the ability to convey your message without resorting to a slew of Photoshop filters. There are some tricks that will help you get there.
One of the most useful tricks is to crop your image before you start retouching it. This will make your photo a lot more usable, and give you some much needed breathing room to make some tweaks. The same goes for adding some post processing polish to your work.
As with all things photographic, you must be prepared to put in some time and effort if you are going to reap the rewards. It is important to be able to recognize when the camera isn’t the only instrument in the room.
If you have a tight deadline, consider sacrificing some of the fun to make sure you get a shot you can be proud of. For instance, if you have to retouch a photograph, you may want to leave the tiniest bit of color behind so you don’t have to do it all over again. Fortunately, most editing programs will allow you to do just that.
The best part is that a good photograph is only the beginning. To take your photo from mediocre to spectacular, you will need a good editor, an eye for detail, and a knack for the art of letting the camera do the work for you.


