

You’ve got a great picture that you want to share with the world, but there’s one little problem – someone has put a watermark on it! Whether it’s a company logo or some other unwanted mark, you want to get rid of it without ruining the quality of the photo. This guide will show you how to remove a watermark from a picture without losing any of the original data.
What is a watermark?
A watermark is a graphic or text that is added to a digital file to identify the source of the content. They are commonly used in advertising and for copyright protection.
There are two types of marks: digital and physical. Digital watermarks are created electronically, while physical marks are applied to physical objects.
Digital watermarks are the more common type. They are usually invisible to the human eye but can be detected with specialized equipment. They can be used to track down copyright infringement or to protect intellectual property.
Physical watermarks are less common but can be more effective at protecting intellectual property. They are typically applied to physical objects, such as paper bills or documents. The mark is invisible to the naked eye but can be detected through special equipment. This type of imprint is often used in conjunction with copyright protection measures, such as digital rights management (DRM).
When it comes to pictures, digital watermarks are used but are made to be visible and usually cover a large portion of a picture so that it can not be used by someone else other than the owner.
How to remove a watermark from a picture without losing quality
The easiest way to remove a imprint is to use an image editing software program. Different programs have different features for removing watermarks, so consult the documentation that came with the software for instructions on how to use it.
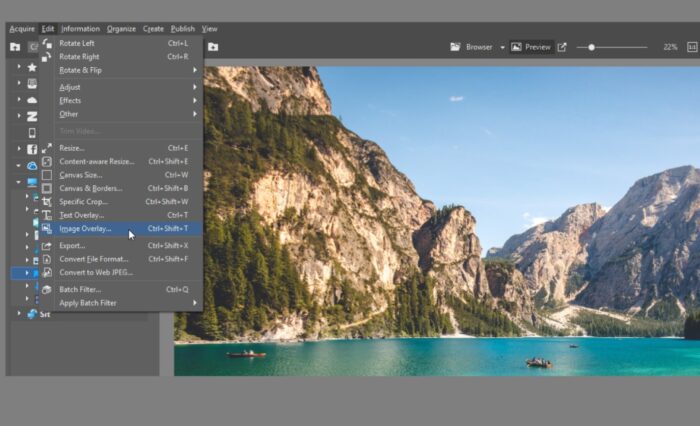
Some common image editing software includes Adobe Photoshop and GIMP. To remove an imprint using Adobe Photoshop, the user will need to open the picture in Adobe Photoshop and select the layers that hold the watermark. Next, they will need to select the watermark layer and use the tools on the toolbar to remove it. The user can also use filters to modify the appearance of the watermark before removing it. However, if the image is in formats like JPEG, when opened in Photoshop, there will be only one layer, and removing the imprint can be impossible. This is where workintool comes in handy.
Enhancing Watermark Removal Skills with Photoshop and Lightroom
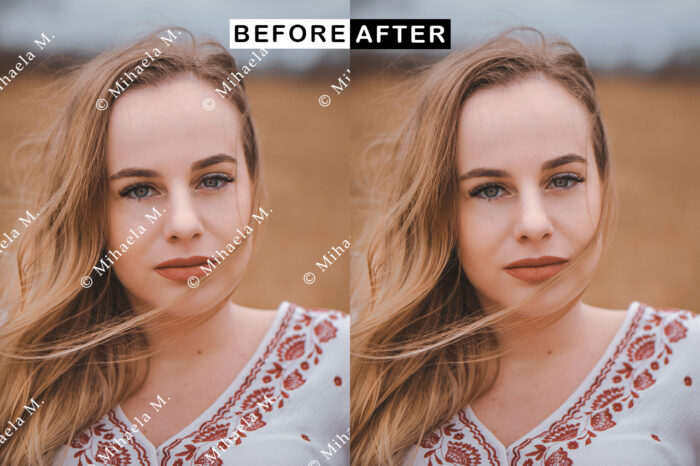
To remove a watermark from an image effectively while maintaining its quality requires precision and the appropriate tools. A strategic approach includes mastering cloning and healing tools found in advanced photo editing software like Adobe Photoshop and Lightroom. These platforms offer sophisticated features that enable you to seamlessly blend the watermark with the adjacent areas of the image, making it virtually invisible. For instance, Photoshop’s clone stamp tool is ideal for replicating textures and details from one part of the image to overlay on the watermark. Similarly, the healing brush in both Photoshop and Lightroom is designed to match the texture, lighting, and shading of the sampled pixels to the target area, ensuring flawless integration.
Achieving proficiency in these tools is key. It involves patience, a keen eye for detail, and a thorough understanding of each tool’s capabilities. Selecting the precise areas to clone or heal and fine-tuning the brush’s size and hardness are crucial steps to ensure the edited portion blends indistinguishably with the rest of the image. Working on a separate layer is a best practice to preserve the original photo. This technique is especially useful for erasing small or subtle watermarks, offering photographers and graphic designers a powerful way to restore the original aesthetics of their work. The journey to becoming adept at these tools, through learning Photoshop and Lightroom, is invaluable for anyone looking to enhance their photo editing skills and tackle watermark removal with confidence.

What about if you want to protect your image?
Adding a watermark to a picture is a great way to protect your images from being copied or used without your permission. There are many different types of imprintavailable, so you can find one that works best for your picture. Here are some tips on how to add a your signature sign to a picture:
- Choose the right watermarking software. There are many different types of software available, and each has its own specific features and capabilities. If you’re just starting out, it’s probably easiest to use a free online tool.
- Choose the right image format. The most common type of watermarking software is designed for use with pictures in JPEG, GIF, or PNG formats. However, there are also tools designed to work with other image formats, such as BMP and PDF files.
- Customize the process. Once you’ve chosen your software and format, you’ll need to customize the watermarking process before you start adding your logo or text logo. This includes choosing the size and position of the logo, as well as selecting a background color or image file for the logo to appear against.
- Add the imprint. To do this, open the watermarking software and select your image. Then, click on the ‘Add Watermark’ button.
- Preview and finalize the watermark. After you’ve added the logo, it’s time to preview and finalize the process. This will allow you to check that everything looks correct and that the logo is legible when reproduced on different types of media.
How to shoot your own images?
If you, however, want to avoid the hustle with watermarks, you can create your own images. There are many ways to create high-quality content, and here are some tips:
- Use a good camera. If you have a good camera, you’ll already be taking better photos and videos. If not, get one! A good camera will capture more light and produce crisper images.
- Shoot in RAW format. Shooting in RAW format means that your photos and videos will have more tonal range – meaning they can be darker or lighter than if you shot in JPEG format. This is helpful when post-processing because you can adjust the brightness, contrast, saturation, and more without losing any data.
- Use a tripod. A tripod stabilizes your camera so that it takes sharper photos and videos without shaking or jittering. It also helps keep your subjects still for easier focus, which results in cleaner shots with less blurriness.
- Adjust your settings. You can also adjust your settings to improve the image quality of your photos and videos. For example, you can adjust the aperture (the opening in the lens that allows light to enter) to let more light into the camera to create brighter images or use a higher ISO (International Standards Organization) setting to increase the sensitivity of the camera and capture more detail in low-light settings.
- Edit your photos and videos later. Once you’ve taken your photos and videos, edit them using different software. You can adjust brightness, contrast, saturation, highlights, and shadows to get the image quality you want.

Conclusion
If you’ve got a picture that’s been watermarked by someone else and you want to remove the imprint without losing quality, there are a few different methods you can use. One is to use image-editing software, which will allow you to edit the pixels of the image and remove the watermark. Another option is to try a removal tool that will scan your image and identify the areas around the watermark where it is located. Once you’ve found those areas, the tool will then be able to delete those pixels from the image without affecting its quality.


