

In the ever-evolving interior design landscape, certain elements stand out for their ability to seamlessly blend form and function. Glass splashbacks are a prime example, offering both practicality and aesthetic appeal in equal measure.
From kitchens to bathrooms and beyond, these sleek and chic additions can transform any space into a modern masterpiece. Join us as we explore the myriad ways glass kitchen splashbacks can elevate your home décor, from their versatility and durability to their endless design possibilities.
Understanding Glass Splashbacks
Glass splashbacks serve as protective barriers against spills and splatters, particularly in areas like kitchens and bathrooms where moisture and heat are prevalent. Crafted from toughened glass, these sleek panels offer a seamless alternative to traditional tiled splashbacks.
Unlike tiles, which can be porous and prone to staining, glass splashbacks provide a non-porous surface that is easy to clean and maintain.
The Benefits of Glass Splashbacks
Hygienic and Easy to Clean
Glass splashbacks offer a smooth, non-porous surface resistant to stains and bacteria. Unlike tiled splashbacks, which can harbor dirt and grime in grout lines, glass panels can be easily wiped clean with a damp cloth and mild detergent.
Enhanced Visual Appeal
Glass’s reflective properties can help brighten and visually enlarge a space, making it feel more open and inviting. Glass splashbacks are available in various colors and finishes, allowing homeowners to customize their space to suit their style.
Durability and Longevity
Toughened glass is incredibly durable and resistant to heat, moisture, and impact. Glass splashbacks are less prone to cracking, chipping, or staining than traditional tiled splashbacks, making them a long-lasting investment for any home.
Versatility in Design
Glass splashbacks come in various design options, including solid colors, printed patterns, mirrored finishes, and textured glass. This versatility allows homeowners to create a custom look that complements their décor and aesthetic preferences.
Easy Installation
A professional glazier can install glass splashbacks quickly and easily. The installation typically involves attaching the glass panels to the wall using a unique adhesive, resulting in a seamless and polished finish.
A professional glass manufacturer can bring your vision to life if you want to incorporate a favorite quote, artwork, or family photo into your design.
Final Inspection
After the installation, the glazier will conduct a final inspection to ensure the glass splashbacks are securely attached and properly aligned. Any necessary adjustments or touch-ups will be made to achieve a flawless result.
Maintenance Tips
Proper maintenance is vital to preserving the beauty and longevity of your glass splashbacks. Here are some tips to help you keep them looking their best:
Regular Cleaning
Wipe down your glass splashbacks regularly with a damp cloth and mild detergent to remove dirt, grease, or food residue. Avoid using abrasive cleaners or scouring pads, as these can scratch the surface of the glass.
Avoid Harsh Chemicals
When cleaning your glass splashbacks, steer clear of harsh chemicals or ammonia-based cleaners, as these can damage the glass and dull its shine. Stick to gentle, non-abrasive cleaning products that are specifically formulated for use on glass surfaces.
Preventive Measures

To minimize the risk of damage, avoid placing heavy or sharp objects directly against the glass splashbacks. Use trivets or heat-resistant mats to protect the glass from hot pots and pans, and avoid leaning heavy objects against the glass surface.
Regular Inspection
Periodically inspect your glass splashbacks for any signs of damage, such as chips, cracks, or loose edges. If you notice any issues, contact a professional glazier to have them repaired or replaced as soon as possible to prevent further damage.
Avoid Excessive Moisture
While glass splashbacks are resistant to moisture, prolonged exposure to water can still cause damage over time. Wipe up spills promptly and ensure that the area around your sink and cooktop is adequately sealed to prevent water from seeping behind the glass panels.
Installation Process
A professional glazier typically installs glass splashbacks to ensure a precise and seamless fit. The process generally involves the following steps:
- Glass cutting ─ The glass panels are cut to size using specialized cutting equipment once the measurements have been taken. Toughened glass ensures durability and safety, as it is less likely to break or shatter than regular glass.
- Surface preparation ─ The wall surface must be cleaned and prepared before installing the glass panels to ensure proper adhesion. Any existing tiles or other materials may need to be removed or smoothed out to create a flat surface.
Design Ideas with Glass Splashbacks
Color Choices
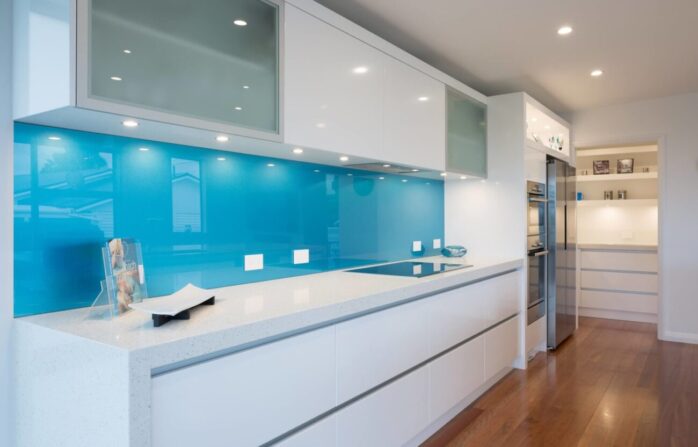
When selecting colors for glass splashbacks, consider the room’s size. Lighter shades can make small rooms appear larger, while dark colors suit spacious areas well. Assess the natural and artificial lighting in the room to choose colors that will brighten or complement the space.
Think about the ambiance you want to create; warm colors can make the space cozy, while cool colors add a modern touch.
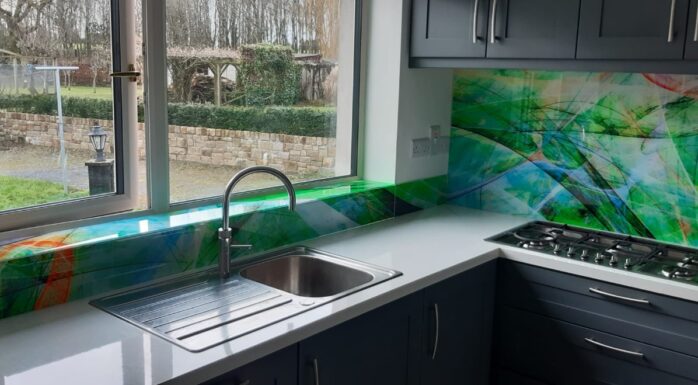
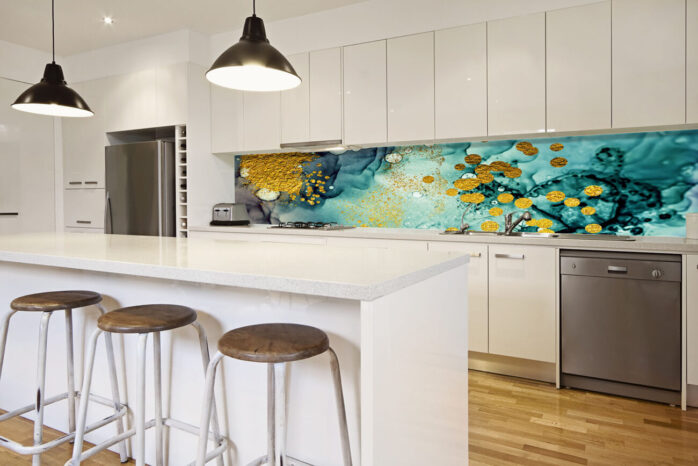
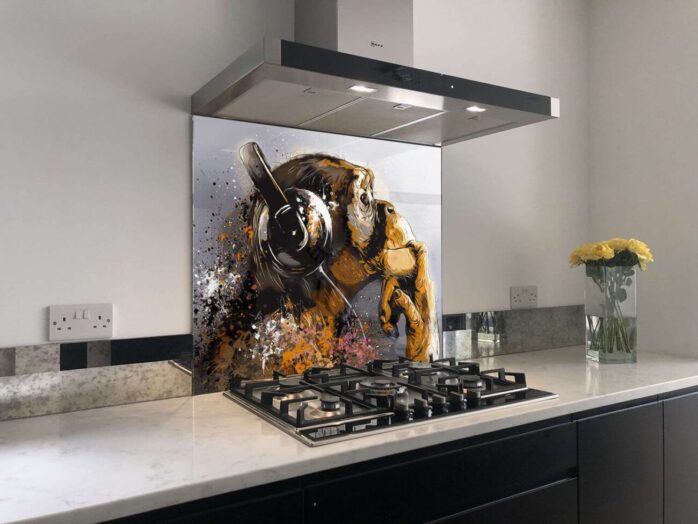
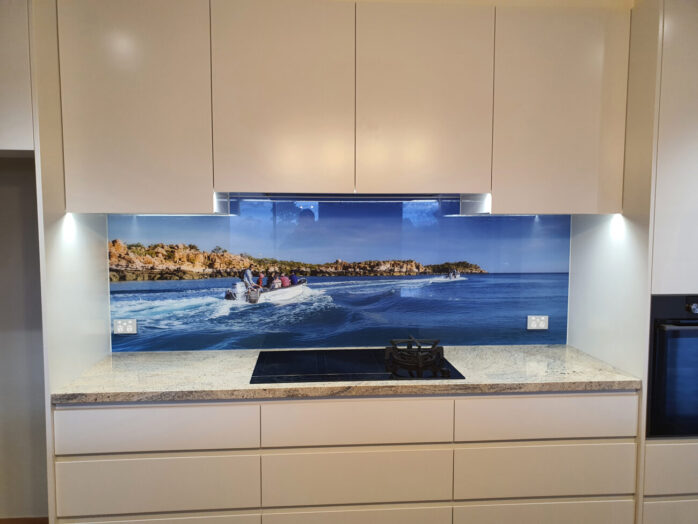
Patterns and Prints
You can personalize your space with custom designs on glass splashbacks, from simple geometric patterns to elaborate landscapes. Digital prints allow for high-resolution images or artwork to be directly applied to the glass, offering a unique way to incorporate personal style or visual interest.
Textured glass options, including frosted or etched finishes, add depth and character to the splashback, enhancing the overall design of the kitchen or bathroom.
Illumination
Backlit splashbacks bring a dramatic effect to any room, creating a focal point and adding ambiance. This lighting technique can also illuminate dark countertops or workspaces, making them more functional.
Choose from a variety of lighting colors and intensities to match the mood you want to set; soft white for a warm, inviting atmosphere or vibrant colors for a bold, contemporary look.
Integration with Other Elements
Coordinating the glass splashback with countertops, cabinets, and floors ensures a cohesive and harmonious design. Consider using complementary colors or matching textures to tie the elements together.
For a seamless look, you can extend the material of the countertop up the wall to become the splashback. This integration can make the space feel larger and more open, enhancing the overall aesthetic appeal.
In Summary
If you’re looking to give your space a fresh, contemporary edge, consider the versatility and beauty of glass splashbacks. They offer a stylish and practical way to update any space.
With endless color choices, patterns, and illumination options, they allow you to express your personal style while adding functionality.


